

Build a beautiful bridal boutique

Materials, tools & supplies
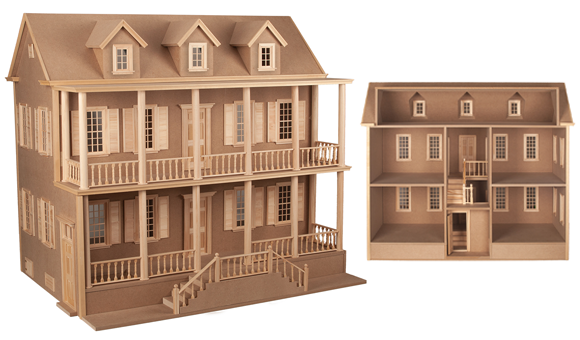
#9055 2-Story Duplex Kit
#50610 15-Light Window
#5014 2-Palladian Windows
#5035 Victorian Bay Window
#59334 Quick Grip
#8206 6-Brick Sheets
#8207 8-Brick Corners
#97008 Ultimate Craft Knife
#1249 Weldbond®
#2076 Mortar Mix
#9064 Sheet Copper
#7008 4-Dentil Crown Moulding
#41001 Miter-Rite™
#4703 Birch Rectangle Shingles
#7062 Roof Ridge Moulding
#81540 Sign Kit
#90004 Electric Soldering Iron & Hot Knife
Additional supplies
Jigsaw, coping saw or scroll saw
Iso-Tip Minidrill
Thin Plywood, Masonite or Thick Cardboard
Cabinet Moulding Trim
2- 24" x 36" Sheet of Foamcore
2-Laser-Cut Basswood Letters A-Z
Heavy Duty Knife
Dow Corning Adhesive
1" Length Straight Pins
Sandpaper
Emery Board
Orange Stick or Wooden Modeling Tool
Scissors
Disposable Mixing Bowl
Paper Towels
Kitchen Sponges
Masking Tape
Ballpoint Pen
Pencil
Thread
Kilz® primer
Testors Paints:
Flat White Enamel Paint
Metallic Copper
Folk Art® Acrylic Paints (or similar paints):
Beachcomber Beige
Antique White
School Bus Yellow
Berry Wine
Light Periwinkle
Gloss Black
Dark Gray
Paint Brushes:
1/2" Wide Flat Stiff-Bristled
1/4" Wide Flat Fine-Bristled
Pointed Rounded
1" Width Disposable Foam Brushes
Satin Finish Polyurethane (optional)
Vinyl Spackling Compound
This project uses power tools. Although the necessary cuts can be made with a coping saw, it is easier to use a jigsaw or scroll saw to expand existing openings and cut new ones.
Modifying Kit Walls
The lower window on the front wall will have to be expanded slightly to fit the 15-light Window.
1. Chisel the upper corners into right angles by using a wood chisel or flat-edge screwdriver and a hammer.
2. Use a Iso-Tip Minidrill or an orbital sander to lower the bottom edge of the opening by 1/16".
The upper window on the front wall will have to be expanded to accommodate one of the Palladian Windows. See the diagram below.
1. Measure up and draw a line 10-3/4" up from the bottom of the wall. Measure and mark 1-5/8" from the left side of the wall. Position the template that comes with the window and trace around it.
2. Use a jigsaw, scroll saw or coping saw to cut the new opening. It doesn't have to be perfect. The window trim -- inside and outside -- will hide any irregularities.
3. Sand any jagged edges to avoid splinters.
A second window opening needs to be cut on the front wall. See diagram below.
1. Measure and mark 1-5/8" from the right side of the wall. Position the template that comes with the window and trace around it.
2. Using a mini-drill or other power drill, make a starting hole inside the window outline. Insert your saw and cut opening as before.
On the side wall with the door opening, an opening needs to be cut to accommodate the Victorian Bay Window. See diagram below.
1. Measure and mark 2-1/2" up from the bottom of the wall and 13/16" from the right side of the wall.
2. Use the template that comes with the window, line it up and trace around it.
3. Make a starter hole with a drill. Insert your saw and cut the opening. Take greater care cutting this opening because it will show although you can conceal some errors with trim or spackle.
4. Smooth the edges thoroughly by sanding and/or spackling.

Priming the Walls & Floors
Use a primer like Kilz® on all pieces, inside, outside and on edges. Apply, let dry and sand.
Bricking the Front Wall
It is far easier to brick this wall before assembling the kit. Because the exterior walls will be covered with brick and morter mix for stucco, use the "good" side of the walls on the inside. This will reverse the sides. Also, we are using the kit's "Back" wall as our Front. Use a glue like Quick Grip® for applying all the brickwork.
1. Start with the front wall and turn it over so the "good" side is down. Measure 3/8" up from the bottom edge and draw a line across the width of the wall.
2. Cut six rows of brick from a Brick Sheet (#8206). Use a heavy duty utility knife to score between the rows two or three times. Then, holding the sheet firmly between your hands, bend the sheet along the score line and it will break apart. Use a sanding block to smooth the rough edges.
NOTE: I hadn't worked with the Common Joint Brick Sheets or Corners before and was having a difficult time cutting them until I used a Weller Soldering Gun with a slicing attachment. It cut through the thick, dense plastic like a knife through soft butter. Cutting in and out of the bricks to make joins was a snap. The fumes were scary so I opened windows for cross ventilation, wore a mask and held my breath when I was leaning over my work. The melted edge of the sheet stays soft for several minutes so I could trim and shape the bricks exactly with my craft knife after slicing the main cuts.
3. Lay the cut rows across the bottom of the wall lined up on the pencil line and flush with the bottom of the window opening. Do NOT glue.
4. Lay a Brick Corner flush against the right edge of the wall overlaying the cut brick rows. With a ball point pen mark where the brick rows will have to be cut so that the corners will lay flush against the wall. Repeat on the left hand side.
5. Insert the window into its opening. The bottom frame trim will overlap the brick rows. Mark where the top row will have to be cut down so the window will lay flush against the wall. Following your guide marks cut and trim the brick rows.
6. Dry position the brick pieces on the wall to make sure they fit and then glue down.
7. Cut another brick corner strip to run up the right side edge above the first strip to the top of the wall. Glue in place. Repeat on the left side.
8. Cut a single row of bricks from a sheet, trim and sand. Measure 9-1/8" up from the bottom of the wall and trim the ends of the row so that it fits between the brick corner pieces as shown. Glue in place.
9. Cut two rows of bricks from a sheet, trim and sand. Position along the top edge of the wall. Trim to fit between the brick corners as shown. Glue in place.

Assembling the Duplex Kit
1. Lay the front face down. Apply white glue along the front edge of one of the side walls. Apply Quick Grip to the back of the bricks sticking up on one side of the front wall. Stand the side wall up flush with the edge of the front wall and flush against the bricks. Press into position. Use masking tape to hold the join of the two walls at a right angle while you repeat this process on the other side. Then, stand the assembly up and check to be sure the walls are at right angles.
2. To re-enforce the joins, use a 1/32" drill bit in your mini-drill. Hold the walls in position and drill as far as the bit will go. Insert a 1" long straight pin dipped in Weldbond® or another white glue into the drilled hole as deeply as it will go and then hammer it the rest of the way in.

3. Apply white glue along three sides of the bottom piece and slide into position. Re-enforce the joins
4. Turn the assembly over. Apply white glue along three sides of the top piece and slide into position. Re-enforce the joins.
5. Turn the assembly face down. Measure up 9" from the floor on each side wall at front and back and mark.
6. Apply white glue along three side edges of the second floor and slide into position using the marks on the wall as your guides with the bottom of the floor even with the top of the line.
7. Measure 9-1/8" up from the bottom edge on the outside of each side wall at the front and back and mark. Drill holes in your marks and re-enforce with straight pins.
8. Test the fit of the vertical and horizontal trim pieces on the front edges of the sides and floors, then glue and tape the trim in place. Make sure the trim lines up in the corners and is tight and lined up with the walls and floors.
Painting the Shop Window & Door
1. Set the acrylic pane for the shop window aside.
2. Disassemble the door: The bottom short brace of the door is not glued in place and allows you to slide the window pane out of the frame. Set it aside.
3. To remove the door from its frame, jerk and snap the threshold off of the bottom of the frame and the door can be removed from its pin holes.
4. Paint all of the wooden parts of the window and door with a thin coat of flat white enamel to seal the wood.
5. Paint the door braces and the window mullions and sill "Antique White."
NOTE: The Shop Window & Door Frame have similar mouldings and are painted in the same way. The uprights have ridges that define a center stripe. The top mouldings have a rim at the top, a set of curves and another rim below that.
6. Paint the center stripes on the upright mouldings blue.
7. Using the stroking technique, paint the outside rims and edges of the uprights with purple. On the door, paint inside of the frame, too. On the window, leave the inside frame "Antique White."
8. On the top mouldings, paint blue on the curves and purple on the tops, top rims, and bottom rims.
9. Apply white glue to the outside edges of the window's acrylic pane and press it into the back of the window. Glue the window into the wall.
10. Reassemble the door: Slide the acrylic pane into the door braces. Apply dabs of white glue to the side edges of the bottom brace and slide it into place. Hold tight until glue sets.
11. Put the top pin of the door into the pin hole in the top of the door frame.
12. Dab white glue on the bottoms of the door frame uprights. Put the pin hole in the threshold over the bottom pin of the door and press the threshold into position against the bottoms of the frame uprights. Hold in position until glue sets.
Painting & Roofing the Bay Window
1. Remove and set aside the acrylic window panes.
2. Paint the window inside and out with a thin coat of flat white enamel to seal the wood. (You don't need to paint the roof.)
3. Paint the window frames "Antique White."
4. Paint the bottom purple and the window sill blue.
5. Paint the ridges and rims above the window frames blue and the top ridge and rim purple.
6. Lay the Bay Window on a flat surface. Unroll the copper sheet and lay it over the roof of the window. Press and smooth the copper around the three sides of the roof and behind the top edges.
7. Along the bottom edge of the roof, use an orange stick or wooden clay modeling tool to press the copper under the lip.
8. Unwrap the copper and use scissors to trim away excess. Re-wrap the copper to be sure you've got a good, smooth fit and then remove again.
9. Use a disposable foam brush to spread a coat of Dow Corning Adhesive onto the roof and press and smooth the copper into position. Let dry.
10. Apply white glue to the edges of the acrylic panes and press into position.
11. Lay the building on its right side. Apply Quick Grip around the inside edges of the window and lay it into position over its opening in the wall. Press down and hold until the glue sets.
Painting the Round Window
1. Remove the acrylic pane and set aside.
2. Paint the window with a thin coat of flat white enamel to seal it. Let dry. Then, paint with "Antique White."
3. Paint the four corners yellow.
4. Apply Quick Grip to the edge of the window pane and press into position.
5. Glue the window into the wall with Quick Grip.
Painting & Installing the Roof Trim
NOTE: Using masking tape makes it easy to paint stripes of color in straight lines across the Dentil Crown Moulding.
1. Paint the bottom "teeth" yellow. Let dry and then cover with a strip of masking tape. Use an orange stick or some other wooden tool to press the tape along the top edge of the yellow.
2. Paint the curves in the moulding purple. It will take two or three coats. Let dry and then remove the masking tape from the yellow.
3. Apply a strip of masking tape along the top of the curves and press along its upper edge.
4. Pat blue along the edge only of the upper rim of the moulding. Let dry. Remove masking tape.
5. Cover the blue edge with masking tape and press down. Paint the flat top of the moulding with Metallic Copper enamel paint. Let dry.
NOTE: The bottom of the trim lines up with the bottom of the top row of bricks on the walls. This puts the top of the trim about an eighth of an inch above the top of the walls and forms a gutter.
6. Measure twice and use a miter box to cut the ends of the roof trims at 45º angles so they fit nicely. Glue in place with Quick Grip. Paint the backs of the trim with Metallic Copper and around the circumference of the roof.
Constructing the Roof
NOTE: The roof can be cut out of thin plywood, masonite or thick cardboard. The supports inside the roof can be cut out of foamcore. The diagrams and dimensions below are only guidelines.
Depending on the thickness of the material you use, the dimensions may have to be modified by an eighth of an inch, plus or minus. The joints do not have to be angle cut, nor do you have to have a perfect fit. All irregularities can be covered by the shingles. The inside supports are the same size as the sides except being approximately a 1/4" shorter.

1. Cut out the front and back roofs.
2. Hold the front and back roofs together at the top with a strip of masking tape and stand them like a tent on top of the building. Set the bottom edges approximately 1/2" in from the roof trim to leave a gutter.
3. Measure the height and width under the roofs to determine the size of your supports.
4. Cut two supports from foamcore (one for each end) and glue the front and back roofs against them. Do not glue the roof to the building.
5. Lean a sheet of your roofing material against the edges of the front and back roofs and draw lines down the joins. The dimensions should be close to ones given above.
6. Cut out the roof sides. Apply glue on their side edges and glue to the front and back roofs. Let the glue dry completely. You should now be able to lift the roof off of the building and sit it on your work surface.
Shingling the Roof
NOTE: To make the roof look like slate tiling, I laid the shingles lengthwise. Shingles do not have precisely squared corners nor are they uniformly sized, so it was more important to line up the bottom edges than the tops. Because of this, I used a shingling technique quite different from the usual procedure of drawing guidelines on the roof.
1. Start on the front roof and mark a vertical line down the center. Glue the first shingle centered on this line and flush with your work surface. Depending on what material you used to construct the roof, this may cover a gap of as much as 1/4" between the edge of the roof and your work surface.
2. Lay shingles on either side of the center shingle out to the side edges of the roof. The outside shingles will have to be trimmed at an angle to follow the line of the roof.
3. To show as much of the shingle as possible, the rows overlap by only 1/4". To set a guide for the second row, measure against the roof 1-1/4" up from your work surface and mark. Do this on one side and then the other. Stretch a piece of thread from one mark to the other and hold the ends in place with masking tape. The thread becomes the bottom guideline for the next row of shingles.
4. After shingling the front roof, do the sides so you can be sure the rows are laid evenly all the way around. Do the back roof last.
NOTE: The joins between the front, back, and side roofs don't have to be perfect. There may even be some spaces where your shingles lacked a fraction of going all the way to the join. This will be hidden in the next steps.
5. After all the shingles are applied and the glue thoroughly dried, cover the whole roof with a thick coat or two of Kilz. This will fill most of the gaps in your joins. After the Kilz has dried, fill any remaining gaps with spackling compound.
6. Paint the roof with two or three coats of Black Gloss Paint so that it is solidly covered. Let dry.
7. Squeeze a puddle of "Dark Gray" paint onto a sheet of waxpaper. Dampen a piece of household sponge and dab it in the paint. Lightly press the sponge onto the waxpaper a couple of times to remove any excess paint. When it makes a speckled impression, it's ready to press onto the roof. Speckle the whole roof by randomly pressing the sponge. Let dry.
8. Cut a piece of roof ridge moulding the length of the top of the roof and paint it Metallic Copper enamel. Glue in place with Quick Grip.
NOTE: I never have glued the roof to the building. It sits on top quite nicely and comes off when I need to transport the shop. The attic could be used for storage.
Final Details
I painted the Laser-Cut Basswood Letters for the front of the shop with Metallic Copper enamel before removing them from the strip on which they come. After the paint dried, it only took little dabs to touch up the places where they were cut loose from the strip.
To lay out the letters, I put down a strip of masking tape -- sticky side up -- and put the letters face down, lining them up with the bottom edge of the tape. I then used a toothpick to dab Quick Grip on their backs and picked up the strip of masking tape and pressed the letters against the front wall. When the glue was completely dry, I carefully peeled the masking tape off. Removing the tape took some of the shine off of the metallic paint and gave the letters a wonderfully aged appearance.
Follow the directions provided with the Bracket w/ Name Sign Kit to assemble it. Paint the bracket purple and the sign blue. I created the sign face in a computer graphics program (Corel 8) and printed it with a color inkjet printer. You could hand-paint your sign or find something suitable in a magazine.
I hope you enjoy this project and learn some useful techniques doing it.