
Most of these Hobby Hints was sent to us by folks like you who have come up with little tricks and methods of enhancing their miniature world. Don't forget if you have a Hobby Hint, we'd love to hear about it. Just email it to us with Hobby Hints as the subject line.
Teresa H. of Green Bay, WI. offers this great suggestion for landscaping your dollhouse. Use a piece of plywood with foam board on top. Put your choice of "grass" on top. We used Noch Grass, #2130 wrapped around the foam board and plywood. You can plant your flowers by pushing the ends into the foam board. I used a pin or small nail to start the holes. My husband also put small nails into the fence posts, cut off the heads and pushed them into the foam board. We used a little glue to make sure they stayed in place.
Katrinka B.offers these great tips. Create a miniature wreath by first creating a base from a pipe cleaner, then saturating it with white glue and toss it into a bag filled with either small dried flowers, spices, beads or tiny sea shells. She says after checking and filling in the blank spots, trim it with tiny ribbon and bows. Katrinka's second tip is a cool way to create a bowl of cereal by filling a small bowl with seed beads (she says the 'pearly' ones work really well), then top them off with white glue. After the glue dries, paint lightly with white acrylic paint.
Linda G. of Casper, WY. writes that the small round plastic moisture-absorbing canisters that come in pill bottles make great 'canned' goods when you add a mini label or small food picture.
Alice B. of Paul Smiths, NY came up with a really easy solution to a messy problem. When gluing, staining or painting, Alice was putting the pieces onto newspaper or craft paper to dry; but became frustrated trying to remove the pieces of paper that would stick to the underside. She now uses regular kitchen wax paper underneath everything; the pieces just slide off, with no residue and nothing to clean off them.
Patricia G. of Pittsford, NY gave us a great tip to reproduce pictures or paintings. Take a picture of the picture so that it is squarely in your lens (sometimes standing over it and pointing the camera down is a good way). Process the picture in your software and you can resize it to fit any frame.
Cha Cha, our staff miniaturist, suggests using a large diameter drinking straw with the flexible end as downspouts for your gutters. Once painted, they look very realistic.
Rebecca P. of NC uses Glad Press-n-Seal to cover floors when painting and to keep mini wallpaper rolled up. The Press-n-Seal sticks to carpet and doesn't leave a sticky residue on tile or hardwood floors. Since it only sticks to itself, can be used around unused wallpaper rolls.
Christina W. of Nova Scotia, Canada suggests using the little curled back off an old pair of pierced earrings as a window latch. According to Christina, the latch is very noticeable and makes a wonderful accent piece.
Margaret R. of Louisville, KY creates mini-blinds by using the plastic pleated liners from packages of cookies. She cuts to the size needed for the window and then paints both sides white.
Jennie & Dusti H. of Rushville, IL craft interesting fireplace screens by making a frame from tiny dowel rods, gluing on a scrap of lace and then painting it black or metallic gold.
Linda M. of Sun Prairie, WI recommends using small fluorescent tubes to light room boxes. We add that many are battery powered and can be mounted behind the room box framing.
Elizabeth D. of Cary, NC uses old Monopoly pieces in her dollhouse: the iron looks perfect on the ironing board, the shoe makes an adorable flower pot and the wheelbarrow serves as a napkin holder on the kitchen table. We add that, after painting them, the dog can look like a ceramic knick-knack and the train is appropriate in a little boy's room.
Barbara B. of Wilkes Barre, PA embellished our black "Welcome" Mat with a gold pen by highlighting the raised letters.

Linda B. of Washington, NC creates realistic fireplaces by either making a false wall from foam core (to insert the firebox) or making a chimney breast above the mantle. She cuts two or three layers of foam core to fit, and then wraps them with wallpaper liner (a heavy paper used to even out old plaster walls) to give the wall the look of plaster. You could also use our Simulated White Plaster Ceiling Roll, #0710 or cover the false wall with wallpaper.
Stacy B. and George C. of Union, NJ use the Rippled Water Sheet, #0029 when constructing a pool or lake and then coat it with Ultra-Glo, #27 for a realistic, wet look.
Madelon A. of Baldwin, NY carefully removes the plastic cover from a roll of postage stamps and uses it as a "glass" cover over a breadboard. We think this idea is great not only for covering tiny loaves of Fimo® bread but also could work for covering small cakes and wheels of cheese.
Debbie M. of Middletown Springs, VT has found that travel magazines have the best pictures for use behind faux dollhouse windows. She tells us that travel magazines rarely have printed over the best parts of the photos, and the scale of the photos also seems to be right.
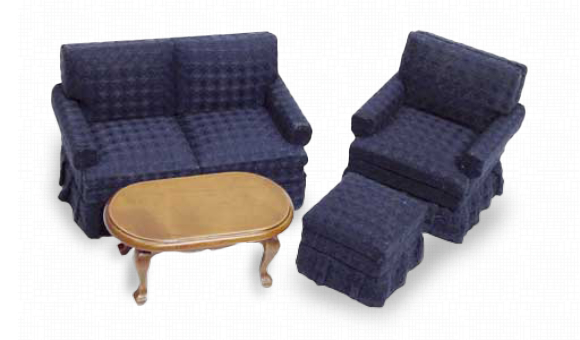
Joan O. suggests contacting a furniture store and asking for 'discarded', outdated upholstery swatches/samples. She has brought home several shopping bags full. Joan usually discards the ones with too large a design. She uses the 'chintz' fabric to make her own couches and chairs.
Brenda A. of Macon, GA discovered a creative way to create a faux leather wall with brown lunch bags from your grocery store. Simply, cut off the bottom of the lunch bag and cut the center seam out. Tear off random pieces about 2" and use the ones with a straight edge for bottoms and sides. Then, take one part glue to one part water and apply the glue mixture to the wall then put a piece of paper up, spread glue over paper and smooth out air bubbles. "When you're done, it looks like leather!"
Carol H. of Pulaski, WI has an easy way to make ice cubes or glass marbles for flower vases. Just heat up your glue gun and let it sit for a while. Eventually, small balls of glue will drip from the tip. Let them harden. (We suggest putting a piece of wax paper underneath so that you can easily peel off the hardened wax bits and don't damage a tabletop).