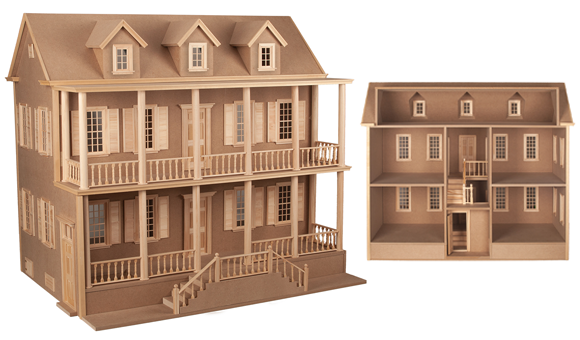
All styles of wood shingles - Octagon , Square , or Fishscale can be used to shingle a roof to look like a real wood shake roof. After deciding on the style of shingle you wish to use, be sure to buy enough packages of dollhouse roof shingles to finish your project.
To determine the number of shingles you will need to shingle your dollhouse roof, first figure the total square inches of the roof. To calculate square inches, multiply the width by the length of each roof section, and then add these measurements together. For example, one section is 12" wide by 6" deep and equals 72" sq., another section is 6" wide by 6" deep and equals 36" sq. Add 72" sq. and 36" sq. for a total of 108" sq.
Next, divide the total square inches of the roof, by the number of square inches the package of shingles will cover. This total ascertains the number of packages it will take to completely shingle your dollhouse roof. If the total contains a fraction, call it one package. For example: If the total square inches were 528, and a bag of 100 shingles covers 76" sq., you divide 528 by 76. The result is that you will need 6.94 bags for proper coverage. Since the total figure (6.94) ends in a fraction, you need to round up to 7 bags, which will cover 532" sq. (7 x 76 = 532). However, when the figure is that close (6.94 to 7), I buy one more package to allow for the cutting of half shingles and the weaving of valleys. By buying an additional package, I am assured that there are enough shingles to cover my roof.
Unfinished shingles are the natural color of the wood. With age, they will darken slightly from exposure to the air. To maintain this natural wood look, apply the shingles straight from the bag, according to the directions. After they have dried for 24 hours, carefully varnish with a polyurethane varnish in order to achieve a finish that can be wiped or dusted with a damp cloth. Also, a polyurethane varnish protects the shingles from changes in the weather.
If you desire darker shingles for your dollhouse roof, apply an oil base stain. There are several ways to do this:
- Paint each shingle with a brush, including both sides and the edges.
- Using a pair of tweezers, dip each shingle in the can of stain.
- Pour stain in an old pan, and mix the shingles with the stain. Several packages may be done at the same time this way. Make sure that all surfaces of the shingles are coated. Lift out the shingles with tweezers, and spread them out on newspaper to dry.
For all of these methods, after applying the stain, lay the shingles on newspaper to dry. Allow 24 hours to dry.
You might also want to stain the dollhouse roof pieces so the natural wood color will not show through. This step is not necessary, but it is an option. If your house is already painted, be careful not to get the stain on the paint.
Be sure to paint or stain the edges of the roof before you shingle. I always go up on the top side about 3/8", so that the wood color underneath will not show through. This step is necessary even though you are going to put trim around the edge. Before you begin to shingle, I would suggest that you put the trim around the edge of the roof.
If you desire a different color for the roof and wish to use wood shingles, you may paint the shingles.
This can be done individually before applying them to the roof, or as a whole, after you have applied them to the roof. If the siding is already painted, be careful when applying the shingles. If you haven't painted the siding, I suggest that you shingle first, then apply the paint.
For one of my houses, I stained the house with an aqua color stain, and used an ivory color paint for the trim. To complete the decor, I stained the edges of the shingles with the aqua stain, and then painted the remainder of the shingles with the ivory paint. I had to finish each shingle individually, but it resulted in a nice scalloped effect.
One of the most important aspects of applying shingles, is to have the proper tools. Although a chopper may be used to cut the shingles, I prefer to use the German miter tool. With this tool, I find it easier to cut and apply the shingles. After cutting a piece of shingle, and discovering that it doesn't fit, you can cut more off, in minute sections, until the shingle fits. The German miter tool is both hand held, and very easy to use. Now that I am accustomed to using it, I cannot work without this tool. It is also great for mitering trim and making picture frames.
To make sure that you apply shingles evenly:
- Start at the bottom edge of the roof.
- Measure and mark evenly, starting from the bottom, and working upward to the top in 1" increments. Repeat this procedure for the other side of the roof.
- Draw lines between the marks with a straightedge ruler. This will result in a 1/4" overlap.
For a greater overlap:
- Lay your shingle on the edge of the roof with a 1/4" overhang.
- Place a shingle on top of the first shingle, to see how much overlap you desire.
- Mark where both the top of the first and second shingle lay.
- The measurement between these two marks is the width between the lines you will draw from the bottom to the top of the roof.
- If you do change to a greater overlap, you will probably use more shingles. The area one package will cover is based on a 1/4" overlap.
To shingle:
- Following the lines that you have drawn, run a bead of good, thick white glue across the roof and just under the first line.
- Starting at the left edge with a whole shingle, place the shingles with the top edge along the line, leaving a small gap between the shingles, and a 1/4" overhang on the edge. (I put a little glue at the top of the back side of each shingle as I put it in place.)
- Place a bead of glue across the next line up.
- Start the second row with a half shingle (cut lengthwise). This row is offset to cover the gaps. Place the top of the shingle on the second line over the shingle of the first row and continue across.
- The third row will start with a full shingle, like the first row.
- The fourth row will start with a half shingle, like the second row.
- Continue to the top, alternating the rows. I usually do 2 to 3 rows, and then let them set for about 15 minutes. Otherwise, the weight may cause them to slide down. It is a good idea to place a 1/4" x 1/16" piece of strip wood along the edge of the roof before you start. You can also cut pieces of the shingles about 3/8" and glue along the edge. This protects the overhang of the first row and will put the first row at the same angle as the rest.
Do all of the flat roof pieces before you do the dormers. Be sure the shingles on each side of dormers match. Also, the rows of shingles on the dormers should match the rows on the flat surface.
When the flat surface of the roof comes to a peak, there will also be a valley. You will have to cut small pieces of shingle to match the rows on each side of the valley as they meet. This is called "weaving the valley."
Each roof peak must have a ridge row at the top. First, bend or break a shingle in half, and then glue one half on each side with the centers of the shingles meeting on the top edge. Start at the front and overlap the shingles on top of each other until you have covered the ridge. You can also use this method for the main ridge of the roof. Either start at both ends and work towards the middle, or start at one end and work across to the other end. Make sure shingles that make up the ridge all face the same way.
Rather than capping the top main ridge of the roof, you can butt the shingles. Apply the front row of shingles a little higher than the back row. This allows the back row to butt under the front row, resulting in a neat ridge.
After shingling, you may add a roof ridge moulding to the top main ridge, instead of making shingle caps. The design of your dollhouse project will determine which roof ridge to use. There are fancy roof ridges available that are great for Victorian Painted Ladies. You may also use corner molding or angle trim as a roof cap.
For shingling difficult areas, such as peaks or facades on Victorian houses, I find the following method very effective:
- Make a pattern of the area that is to be shingled. (See the Flooring Section.)
- Copy the pattern design on a piece of light cardboard and cut it out.
- Install the shingles onto the cardboard, letting them overhang at each end and over all openings.
- Once the panel is covered with shingles, turn the assembly over. Using your utility or X-Acto knife, trim off all the excess.
- Now you have a panel of shingles which is a perfect fit for the facade.


