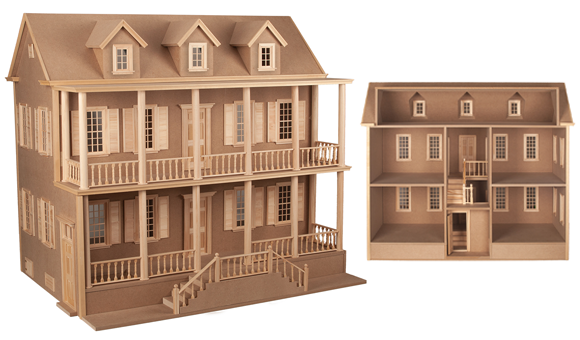
The outside of a dollhouse or miniature project can be finished in several ways. While painting is perfectly acceptable, adding clapboard siding, stucco or brick to the outside walls gives your dollhouse a more realistic look. So how do you install clapboard siding on your dollhouse? Read on to find out.
Clapboard siding is available in a variety of sizes, including 1/2", 3/8" and 1/4" lap widths, and 12", 24" and 36" lengths. The common factor is that most siding is 3-1/2" in width. The clapboard piece has a lip on the back of the bottom edge that fits over the top edge of the next piece. When applied properly, the clapboard siding will appear seamless. Each piece should match the next in order to look like another strip of clapboard. The most common size used for 1" scale dollhouses is the 3/8" clapboard. For 1/2" scale dollhouses, I recommend using the 1/4" clapboard. The 1/2" clapboard is used when a wider clapboard look is desired.
It is necessary to measure the square inches of the area to be covered. I would suggest that you do not deduct the areas for the window and door openings from your measurements. Just pretend they are part of the solid walls. Although dollhouse clapboard siding is commonly available in packages of 10 pieces, most shops will also sell individual pieces of clapboard. For most dollhouse projects, I normally buy the 24" long clapboard. However, if you have a large dollhouse with solid walls that are wider than 24", you should purchase the 36" length for proper coverage. Remember the first rule of siding: be sure that the pieces are long enough to fit across the length of the longest wall. It is always better to be able to cut a complete length without piecing the clapboard halfway across.
Cut all the siding pieces for each wall before gluing in place. This makes the application much easier and more accurate, because you can work out the discrepancies on the dry run.
If you are not putting the windows and doors over the clapboard, you must measure and cut dollhouse clapboard siding around the trim on the windows and doors. Do this as you are fitting each piece and before you begin gluing. This takes patience - particularly if doors and windows have fancy trim.
Start on the front of the house. Always bring up all areas of the wall equally. Short panels between windows are installed at the same level, so that continuous panels will fit properly along the length of the exterior wall.
- Hold the first piece of clapboard siding along the bottom edge of one wall flush with the corner of the house or an inside corner.Hold the clapboard in place. With a pencil, draw a line at the end, on the back of the piece, where it will be cut.
- Still holding the piece in place, go inside the house, draw a pencil line around the window and door openings that are covered by the piece of clapboard.
- Remove the clapboard. Lay it flat, with the back side up on a piece of wood or cutting board. With an X-Acto knife, cut the clapboard on the outside of the pencil lines.
- After cutting, hold the piece back up to the house against the wall to check the fit. Be sure the bottom edge is in the correct position.
- Draw a line on the outside of the house along the top edge of the piece.
- Mark the piece #1 and the space on the house #1.
- Fit the next piece on top of the piece labeled #1. Be sure the lip fits over the top of the bottom piece. Draw lines where you wish to cut-at the end and around the openings.
- Cut along the lines. Fit the pieces back on the house and place the pieces and coordinating spaces in numerical order.
- Continue this procedure until all pieces of the clapboard have been measured, cut and numbered for the front wall of the house.
Working in a well ventilated area, work on one piece of clapboard at a time. I recommend using Quick Grip glue. Take piece #1 and run the glue in a 1/8" bead on the back of the piece, inside the edges.
For painted clapboard, apply the glue in a zigzag pattern, in the center of the clapboard piece. For unpainted clapboard, proceed as above except before attaching to the house, smooth the Quick Grip with a small stick to cover the surface of the clapboard completely. This step will help eliminate warpage, since the back of the clapboard has not been sealed with a paint or stain.
Place the clapboard piece #1 into position on space #1. Be sure the piece is flush to the bottom edge and to the corner. Smooth the entire piece into place, and then briefly remove. Be sure it is in the right position. Press the piece back into place. Double check both edges. There is still a little time to make adjustments. Once it goes in place, the piece will not move. Once you are satisfied with the placement, smooth into place with a clean cloth. Be sure the glue does not ooze out on the top edge. If it does, the next piece will not fit. The more pieces you fit the easier the job becomes. Continue with each piece in numerical order until the front is done. Always check the top edges for overlap. Also check the edges to make sure the glue has not oozed out, making it difficult to line up the next piece correctly.
After the front is finished, do the side walls in the same sequence, matching the end of each piece of clapboard to the corresponding end on the front. The lines of clapboard should match as you go around the corner. After finishing both sides, complete the back wall, matching to both ends.
To put clapboard on dormers, an angled wall or an unusually shaped area, it is best to make patterns for each surface that will require clapboard. Place the pattern on the back of the clapboard in the correct position, in order for the clapboard to fit on the house. Be careful - it is easy to reverse patterns. (See Flooring Section.)
The clapboard is usually applied to the dormers horizontally to match the clapboard on the house. However, many Colonial homes had dormers with the clapboard applied following the angle of the roof.


