

Thus far I have discussed procedures that apply to the dollhouse industry in general. This section deals specifically with Houseworks products. All numbers referenced in this section are Houseworks product numbers.
Most dollhouses today are scaled to satisfy the most demanding miniature collector, 1" to 1' scale or 1/2" to 1' scale and fit precisely with Houseworks complete line of dollhouse components.
Miniature hardware is the finishing touch for your dollhouse doors, windows, fences and furniture. Houseworks hardware is made of gold plated brass in exact replicas of many styles and period pieces.
Some of the special uses for the hardware are explained individually. For example, there are various styles of hinges each having a specific purpose for your dollhouse. The Butt Hinge and "H" Hinge are best for attaching doors to frames when a pin hinge has not been used. If the wood is thick enough, use longer nails to hold the hinge, and apply as directed in this section. Also, these hinges can be used for screen doors. The "T" Hinge and "HL" Hinge are normally used on gates to attach to fences as well as doors for log cabins and rustic, primitive or colonial houses.
All Hardware should be applied with glue that adheres unlike objects together such as metal to wood. The glue that I like to use us Bond 527 glue, which available in a tube or dispenser. One reason for my preference is that it dries clear.
For hardware with nails and nail holes:
- Instead of pounding the nails on the hardware, use a pushpin and punch a hole in the wood.
- Glue the hardware onto the wood.
- Use needle nose pliers to hold the nail, and push the nails through the hardware into the holes. This will glue them in, since the glue will go into the holes.
To make a miniature awl to use for making holes for the nails:
- Cut a 1/8" to 3/8" dowel, 2" to 3" long.
- Cut the head off of a dressmaker pin.
- Using needle nose pliers, push the flat cut off end of the pin into the center of one end of the dowel.
Several of the hardware pieces come with keyholes and keys. If you would like to put the key in the lock, carve out a vertical hole in the wood under the keyhole, deep enough to hold the key in place.
Should you want the key to be stationary in the lock and not stick out too far:
- Glue the plate and doorknob onto the door over the hole.
- Cut the end off the key.
- Glue the key into the hole behind the keyhole. You can make a tassel from embroidery floss for the key and hang it on a nail inside the door or add the tassel to the stationary key.
4mm Long Nails may be used with the hinges and doorknobs that do not come with nails. Use these nails for looks only. Attach these nails following the directions outlined above. When you have thicker wood and want a more permanent contact (such as hinges on a door), use the 6mm Long Pin Nails.
Many hardware pieces, like a DoorKnocker, Furniture Caster or Cabinet Pull, have small extensions on the back. In order to attach these pieces, you need to make a hole in the wood, and glue both the extension and the piece onto the wood, using Bond 527 glue.
A Bell Pull end is used as an end (s) on miniature embroidered bell pulls. These should be sewn on. You may use one at the top for a hanger and one at the bottom with a small bell, or attach a tassel made out of embroidery floss.
Americana Lock is the type that is used on most of the doors on the buildings at Williamsburg. Attach the small piece on the frame and the larger piece on the door. These locks are used on both exterior and interior doors.
"S" Hooks are used at the bottom of the shutters, usually placed either near the outside edge or to the middle of the shutter. Glue them onto the shutter with Bond 527 glue. Since shutters were hinged to close across the windows to keep out cold and inclement weather, "S" Hooks were designed to keep the shutters open during nice weather.
A double picture frame can be made from a Square Hinge by gluing a picture on each side. If you want some dimension, glue a gold jump ring over each picture. Then trim and glue to the square hinge. This results in a round picture on each side.
The saloon Swinging Door is two louvered doors set inside the door casting, which fits inside a standard doorframe. The saloon door works very well between a kitchen and dining room and adds an authentic touch to bars, saloons, taverns and bordellos.
Fitting Doors For Die-Cut Houses
Houseworks doors do not fit in die-cut houses because the frames extend too far into the house. You can trim the inside extension of the frame to fit the measurements needed and then reset the door or the door can be installed over the siding. If you install the door over siding, you need to add a shim of 1/8" x 1/8" strip wood around the interior frame on the back of the exterior trim by the door. This also applies to the windows.
The Bay Window has small pieces of cardboard that are glued on the inside top and bottom in order to hold the windows in. When you remove these pieces of cardboard to paint, a residue of glue is left. It is my belief that the manufacturer uses rubber cement to attach the cardboard. The only way I have found to remove the residue is with a pencil eraser. Work from right to left or left to right, going in one direction only. This will sort of roll the glue residue up so that you may remove it.
The Houseworks pediments Federal Circle, Federal Hooded and Deerfield allow you to trim the top of a traditional window to match your doors. It also enables you to trim the interior windows in the style of many houses during the colonial era (such as the Williamsburg).
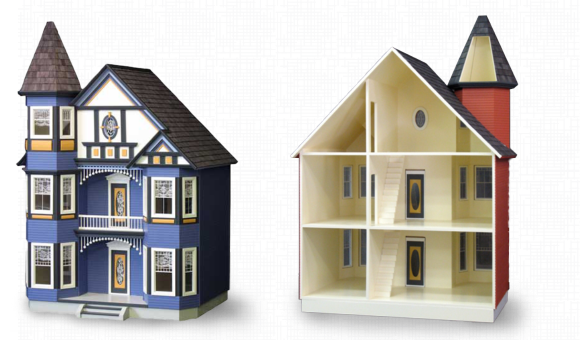
Converting the Victorian Style From the 3 in 1 Planbook to a Back-Opening Dollhouse
To convert the front opening Victorian Style Dollhouse kit to a back-opening house follow the suggestions outlined below:
Note: you can reverse the construction of the house.
Front:
- The basic front piece will be cut in two pieces horizontally instead of vertically. This allows you to build the floors as per directions.
- The first and second floor pieces will have the 1 1/8" x 3/8" notches cut on the back instead of the front.
- Both the bay window section and porch sections will be added after the two floors have been glued together.
- On the second floor, you may want to put the interior partition for the bedroom and bathroom wall with the door to the back of the house. Thus, the bathroom is placed in the front section of the house with the opening to the back.
- You can leave out part seven (the arch in the dining room), making the stairway visible from the back. This allows you to put a closet, shelves or half bath under the stairway.
Back:
Note: the back of the house can be left open and trimmed out.
If you prefer a closed back on the dollhouse, you have two options:
- Construct the back in one piece and hinge on one side or.
- Cut the back in two pieces vertically along an interior wall line. Then hinge each piece to the respective side of the house.
Note: If you are cutting windows and a door on the back, cut the back vertically between the door and window. Then hinge each piece to the respective side of the house.
Roof:
- The front roof will be cut in one piece instead of two and glued in place. Then the dormers and dormer roof can be added.
- For an open-back section of the roof in an upside down "U" or arch shape to trim the back section. This piece would be approximately 2 7/8" from the top for the center with side extensions approximately 2" to 2 1/2" wide. (Use the dimensions for #33 and add the side extensions to complete the size for piece #32.)
- To close the back, cut #32 in two pieces. The top piece will be equal to the size of piece #33. Then hinge the roof.
The various size bookcases available can be used as book shelves for a library, wall shelving for a store, as a room divider, etc.
To light the upper shelves to set off special objects:
- Drill a hole in the upper corners of the back of the bookcase.
- Thread a Grain of Wheat Bulb on White Wire or a Bulb with Socket on Wire through the hole.
- Put a piece of tape over the wire on the back to hold the light stationary.
- Plug into a wiring system or direct wire to either tape or hard wire.
To achieve a different look for a gift or candy shop, glue small mirrors in the back of the bookcase on each shelf. A more formal built-in look can be achieved by trimming the top of the bookcases with Crown Dentil Moulding.
An architectural design bookcase may be created by adding Federal Hooded Pediment, Deerfield Pediment or Federal Circle Pediment to the top of the One Unit Bookcase or the Three-Shelf Corner Cabinet. One pediment can be added in the middle of the Three Unit Bookcases. For a design or one pediment with fancy trim.
All Houseworks fireplaces are made from a quality grade of wood that allows for the application of a very nice stain. They may also be painted. There is a new marbleizing kit now available on the market that can be used for miniatures. Small feathers can be used for streaking as well as brushes, sponges, etc. to get the finish that you want on your fireplace. You can also use this kit for a faux marble finish on furniture, baseboards and trim.
The Houseworks 12 Volt Transformer is protected with an automatic circuit breaker and has 1333 milleamps output. It illuminates up to 26-50 m.a. bulbs or 10-65 m.a. bulbs. To determine the number of light fixtures you need, count the number of bulbs and check the type of bulb you will be using. Then add all of the m.a. together to get the total. Be sure to include fireplaces, porch or coach lights and Christmas tree lights.
The Colonial Coach Lantern has a replaceable screw base candle flame bulb. Use replaceable candle flame bulbs. To change the bulb, unscrew the top of the brass lantern.
Because Houseworks Large Crown Moulding and Small Crown Moulding are angled on the back, they do not fit completely into the corner on the ceiling. This allows hard wire to be run and hidden behind the moulding. The Dentil Crown Moulding fits flush into the corner.
Houseworks Baseboard is grooved on the back which allows hard wire to be run and hidden behind the baseboard.
To make your own string of Christmas tree lights for less money you may use a 1.5 Volt with 8" wires. Purchase 11 of the bulbs.
- On nine of the bulbs cut one lead wire 1-1/2" long and leave the other lead long.
- Strip the ends of each lead wire about 1/4" exposing bare copper wire.
- Wipe the surface clean.
- Take two bulbs. Twist one short end of the exposed copper wire of the first bulb to the long end of the exposed copper wire of the second bulb.
- Dip the resulting twisted end of the copper wire into neck of tube of GE Silicone sealant to insulate the connection.
- Continue connecting the remaining seven bulbs in the same manner.
- There will be two bulbs that still have two long lead wires. Connect one long lead wire from one bulb to the long wire on the second bulb. Then connect the long lead wire from the other bulb to the short end of the first bulb.
- Dip in Silicone.
- Leave the string of bulbs for the silicone to dry.
- After they have dried take the two remaining long lead wires from both bulbs and attach to a Male Plug.
- These bulbs will draw approximately six milleamps per bulb.
- This string can be attached to your existing system.
H-Scale (1/2" to 1') Components
The H-scale components are a full line of the most popular styles of windows, doors, stairs, dormers, accessories and hardware in 1/24th scale (1/2" to 1').
All of the instructions for applying, painting, staining etc. for the 1" scale can be used for the 1/24 scale.
1/24 Scale Hinge
Cut the points off of a Triangle Hinge to make a 1/24 scale hinge. Use the small nails to secure as directed in Applying Hardware.